
Would you like to improve your export workflow in Adobe Lightroom®?
Do you want to automatically change quality and resizing when converting RAW to JPEG based on rating of your images (higher quality and larger files for best images)?
Why not choosing output format (JPG vs TIF for post-processing) just marking your RAW photos?
You need the best export plugin for Lightroom® Classic: PhotoWhisker©.
PhotoWhisker© boosts the flexibility of export process in Lightroom® by offering many additional features fully configurable on your specific needs:
- 1convert to JPEG with quality depending on star rating of each source image - higher quality for better images;
- 2convert to JPEG with image resize depending on star rating and pick flag of each source image - larger files for better images and smaller files for less important ones;
- 3export to TIF for post-processing in Photoshop® (instead of exporting to JPG) just marking images with a color label of your choice;
- 4remove a specific keyword from source image (useful when you tag images "to be exported");
- 5decrease pick flag (e.g. set to flag to remove) to source image after its conversion to JPG or TIF;
- 6apply a color label to exported image if its file size is bigger than a specific threshold.
 PhotoWhisker Features
A new export workflow with PhotoWhisker
When importing into Lightroom:
- assign a keyword to mark your RAWs, like "toExport". You would have a smart collection based on this keyword to keep the list of RAWs to be converted.
During Develop and Browsing your RAWs:
- set star rating to your images - more stars where you want more quality in JPG, less where you can save storage with less quality;
- set Pick flag to images that you want to keep in the original (RAW) format;
- set a color label (e.g. blue) to images you need to export intermediately to TIF;
- you can optionally assign your images to you desired collections.
Now just select your images and export them with PhotoWhisker: this plugin will...
- convert to JPG selecting for each image export quality and resize based on your rating. Your 5-stars images will be best quality and your file size of 1-star ones will be up to 6 times smaller! You can tune this behavior as you like in the configuration.
- if a JPG file is too large for your tastes (you can configure this threshold in PhotoWhisker configuration), a specific color label (e.g. purple) will be assigned and you can re-export it with lower quality or size.
- the "toExport" keyword will be stripped from RAWs so that your smart collection of images to be exported will be updated;
- for images that you do not want to keep the original (without the Pick flag), a Reject flag will be set to the source/RAW so that you can later delete them;
- images with the blue color labels will be exported to TIF instead of JPG, for your editing in Photoshop@ or external editor.
- the produced JPGs will be assigned to the same collections of their source RAWs (if any).
Quite a saving of time and storage space!
User Guide
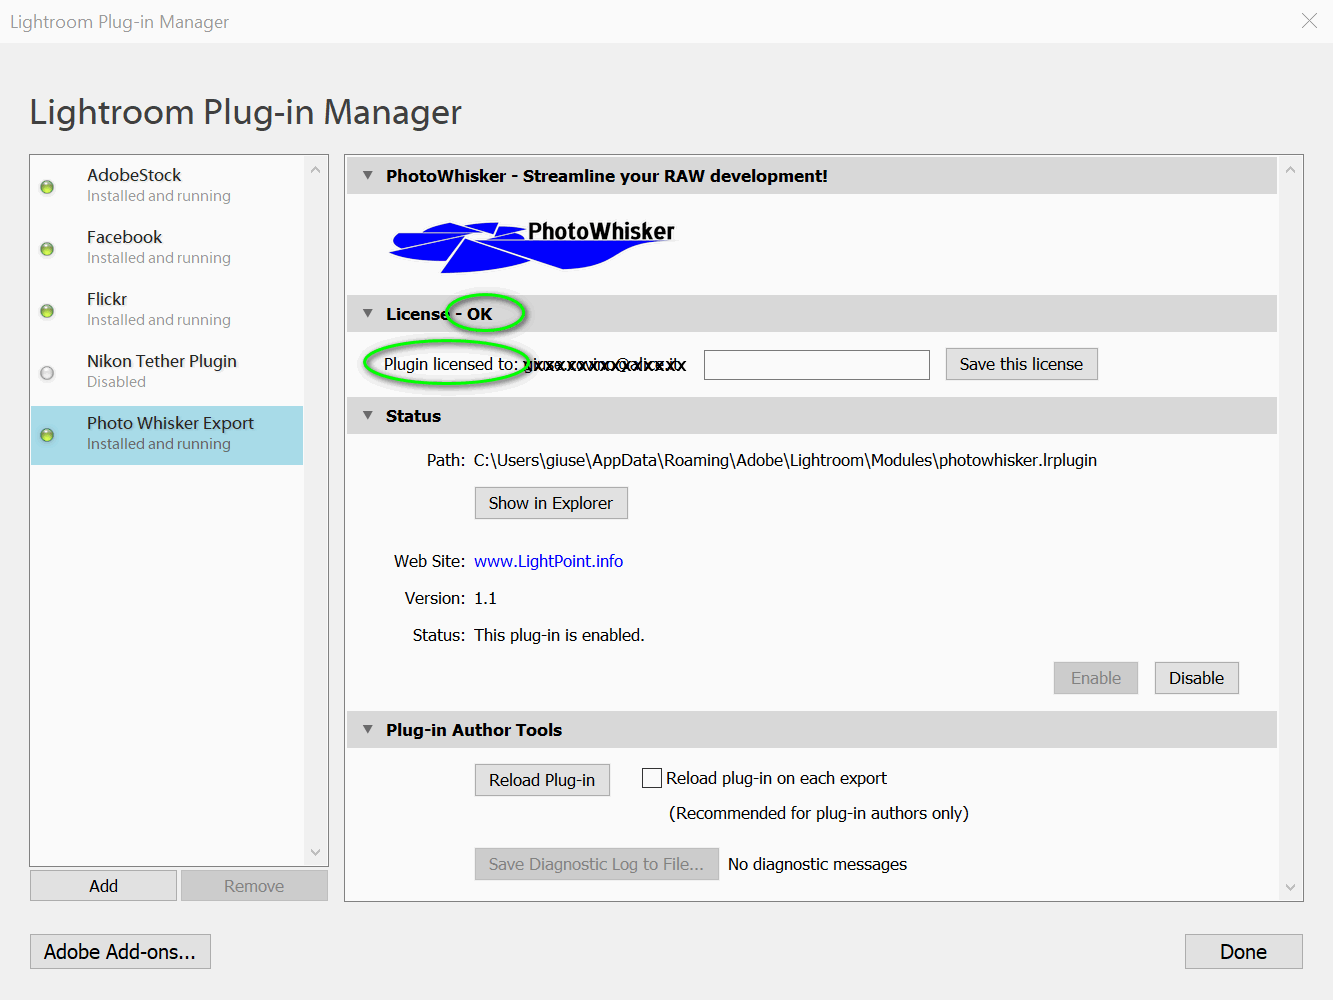
1. Installation
Please follow the provided User Manual to install PhotoWhisker and enter your license so that it is enabled in Adobe Lightroom® - see screenshot below.
2. Features Guide
PhotoWhisker offers many additional features for exporting your images in addition to what Lightroom® provides, they are described in details in this section.
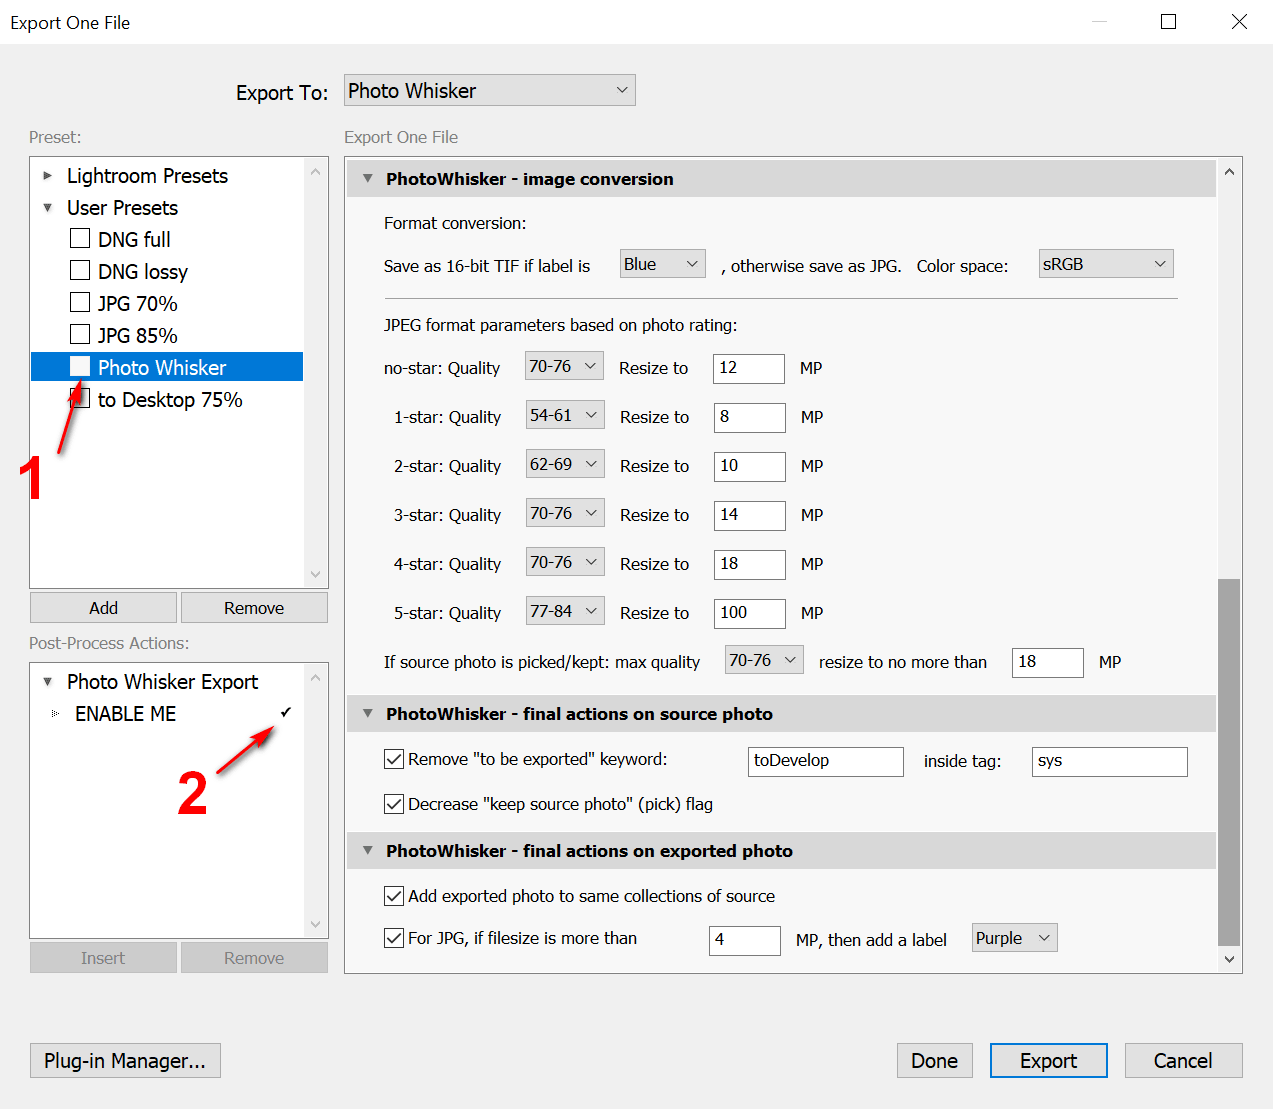
Important: when you export images through PhotoWhisker, make sure to have it selected as the export method like in the screenshot below:
Now let's see how to configure each functionality.
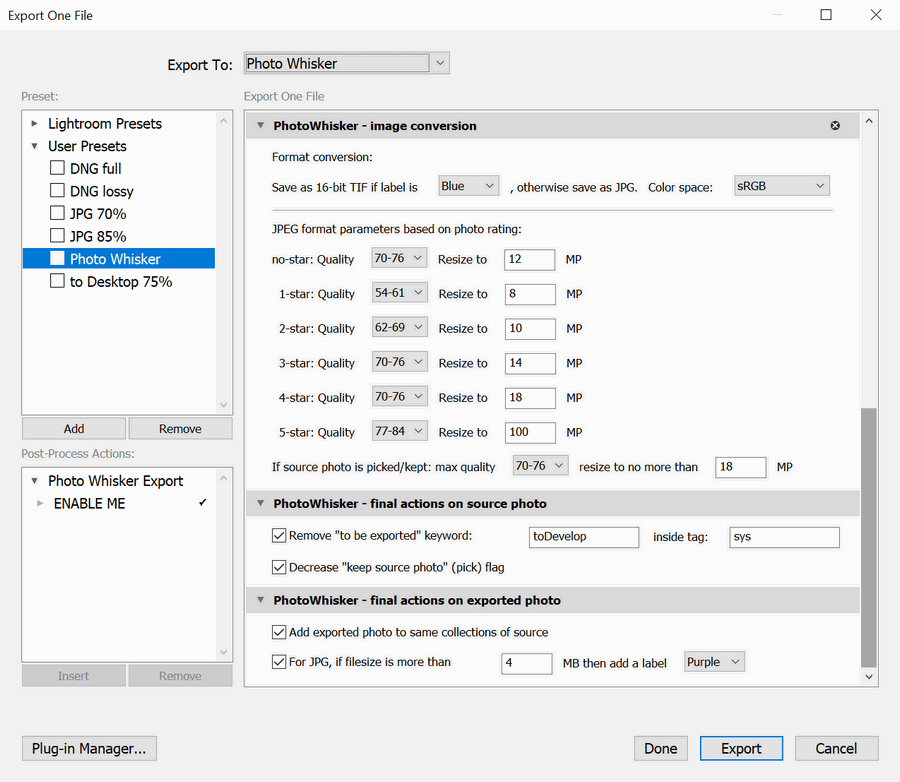
Image Conversion
In this part of the Configuration you decide how the export will be done:

- by default input images are exported as JPG files but you can choose to export some images as TIF applying a color label to them and in this panel you can choose that color. For example if you want to post-process some images with external editors without loosing quality, you need to convert them to TIF before opening in those editors: in this case just apply the specific color label to them and PhotoWhisker will export them as TIF files instead of JPG.
- You can also select the color space for the exported image with the options provided by Lightroom sRGB being the default.
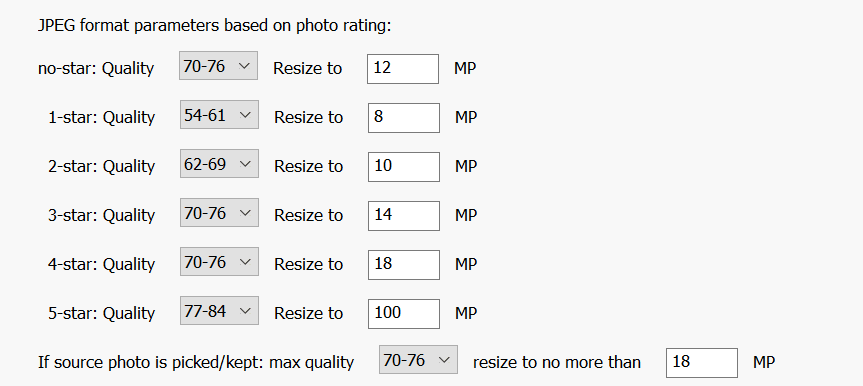
- In the above screenshot you can see the options available for exporting to JPG: based on star rating on each image, PhotoWhisker will choose quality and dimension resize specified in that panel. In this way you can have higher quality and larger files for your better images and save storage space.
- There is an additional option to set quality and resize for images with the Pick Flag set.
- Note: quality is indicated with a range since Lightroom does not change quality inside that range (in other words, for example quality 70 to 76 is treated without any difference by Lightroom).
Final actions on source photo
After an image has been exported, you can have PhotoWhisker do some actions for you on the input/source image.

- You can ask PhotoWhisker to remove a specific keyword from the input/source image, typically that option is used to delete the tag that mark the image to be exported. In case that keyword is under another keyword, the first level keyword can be typed into the "inside tag" box. In the default configuration, the keyword sys > toDevelop will be deleted from source image when the export has been done.
- The second option allows you to decrease the Pick flag, that means:
- if the image has the Pick flag set, this option will remove the Pick from the image.
- if the image does not have any flag, this option will add the Rejected flag.
- if the image has already the Rejected flag set, this option will do nothing.
Final actions on exported photo
After an image has been exported, you can have PhotoWhisker do some actions for you also on the exported/target image.

- You can ask PhotoWhisker to add the exported image to the same collection that holds the source image.
- In caso of export to JPG file, you can require that if the exported image file size is bigger than a specific threshold, PhotoWhisker adds a color label so that you can immeditely notice that and maybe redo the export with a lower quality and smaller file size.
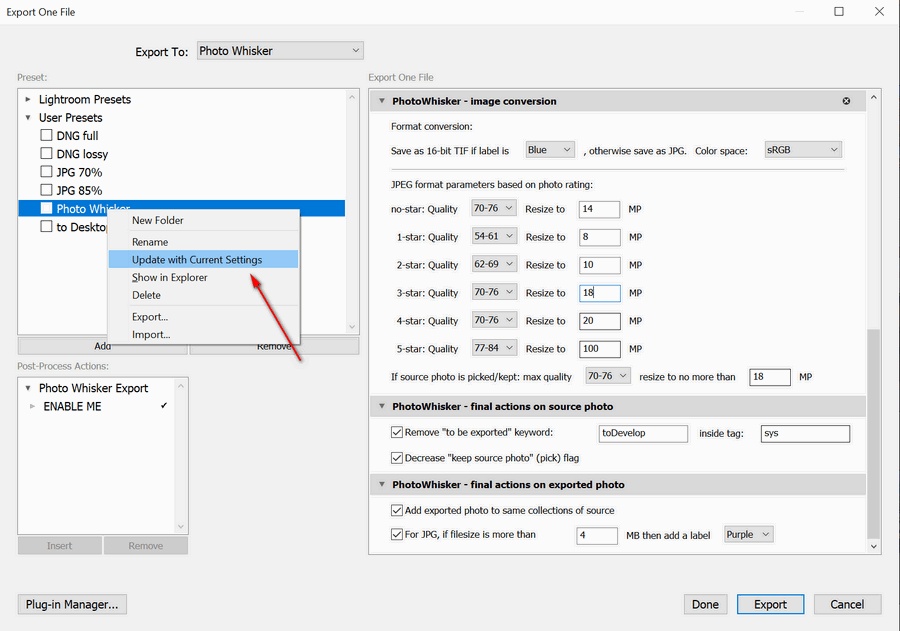
Change default settings
What if you need to change the default settings (resize factor, labels)? No problem: just set your values and then right-click on the profile and choose "Update with Current Settings" (see screenshot below).
Version history: available at this link.
If you need more information, you can ask for support through the Info - Contact Us page.